TEAGLU
Secure Email with Microsoft 365
If the practice has Microsoft 365 for their company email, we can send email in such a way that it never leaves the organization, and therefore is covered by the Business Associate Agreement with Microsoft. We do this by sending the email from inside the organization, and to do this we have to have our server authenticate to the customer's Azure Active Directory tenant.
Configuration Overview
Configuring access is composed of registering an application, setting the required permissions, attaching the application to the tenant, and granting it rights on the end user tenant. At the end of the process we will have the following three items of information:
| Information | Use |
|---|---|
| Tenant ID | The tenant ID of the customer's Azure directory. |
| Client ID | The client ID of the application registered in the customer's directory. |
| Client Secret | The secret password used for access. |
Registering the Application
Registering an application in Azure Active Directory creates an object that represents your running copy of the program. Under the application you create client secrets that allow the running application program to authenticate to Azure Active Directory and access resources as that application.
All of the steps in this section are done from the Azure Active Directory control panel under portal.azure.com. This control panel will open in an Overview page that shows your tenant ID - which you will need later:
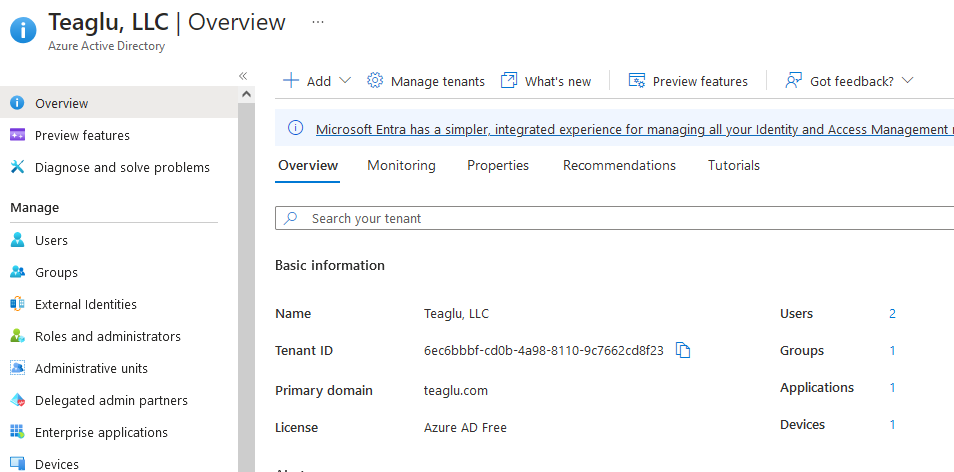
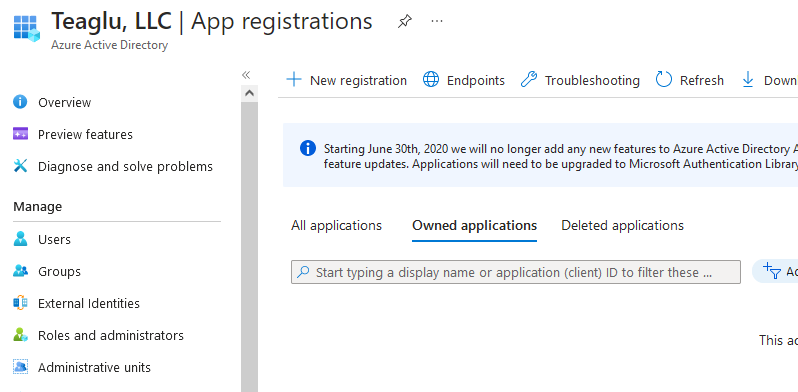
Next go to App Registrations on the left navigation panel, go to the Owned applications tab, and select a New registration. This will create the application object which will be used to send email:
The new registration will require an application name, which is commonly set to your business name so it will be identifiable to customer administrators:
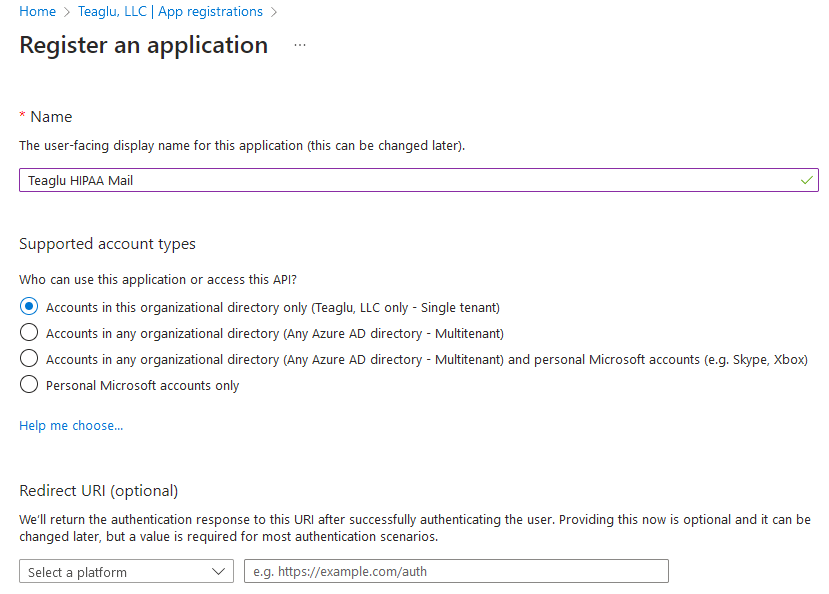
The redirect URI is not needed in the workflow used by this application.
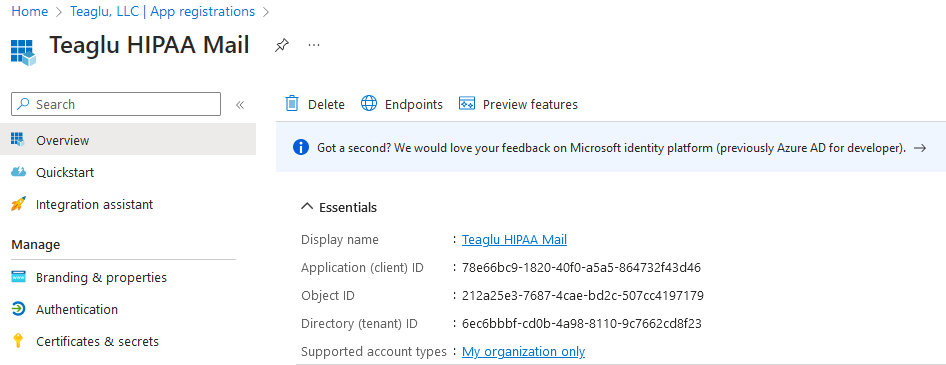
After creating the registration you will return to a page that shows information about the application. Copy the application (client) ID as this is the second piece of information the program needs to operate:
Select Certificates & secrets on the left navigation panel, and you will find an option to create a new secret - it will look like this:
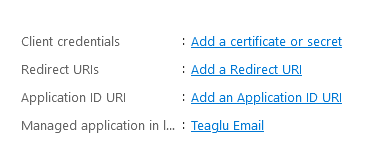
Select to create a secret, and the right panel will allow you to set a name and valid period. If you set a short expire time, it is your responsibility to create a new secret and change your configuration before that secret expires.

After the client secret is created, it will show in the list of client secrets:

Copy the Value column - this is the third piece of information needed for the application to authenticate to Azure. If you navigate away from this page the value cannot be retrieved again, and the secret will have to be deleted and re-created.
Setting Application Requested Privileges
After setting up an application, you have to tell Azure which permissions the application should ask for. While still on the application page, select API permissions in the left navigation bar:
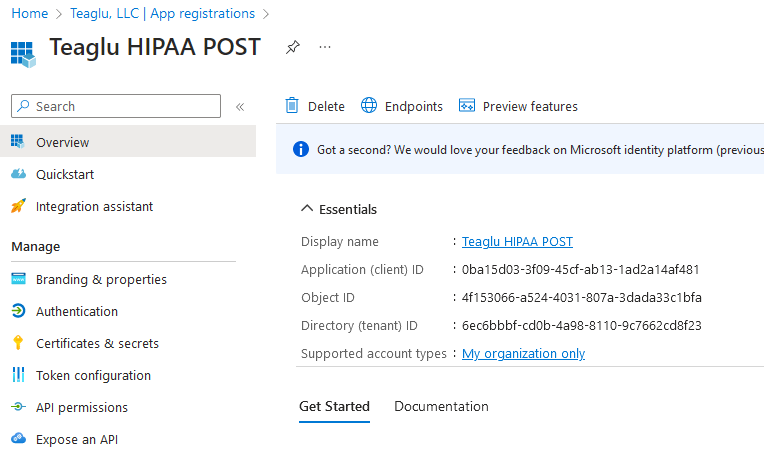
Clicking that link will show you a list of configured permissions. By default the only permission the application has is to read the calling user profile - we need to add the permission to send emails:

Press the Add a permission button, which will open a list of APIs:
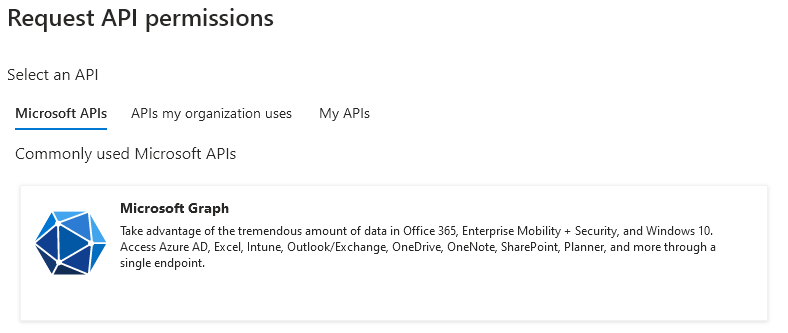
Select the large button for Microsoft Graph, and you will be at a screen where you can select delegated or application permissions:

Select Application permissions, and you will have a long list of permissions. Scroll down to the Mail heading and select Mail.Send:
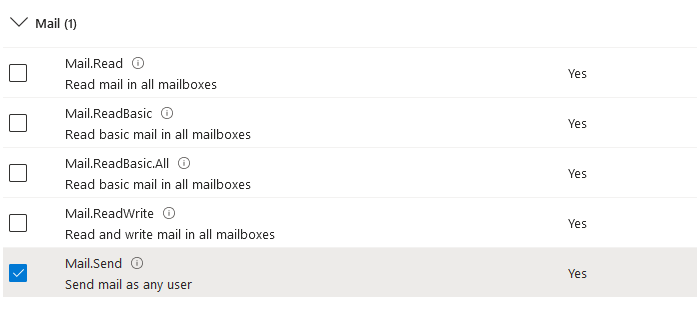
When the permission is added, you will see the permissions added but with a status of Not granted:

Approving Application Permissions

After approval is complete, securely send us the three items - tenant ID, client ID, and client secret - and we will configure a mail destination and begin testing delivery. If you want to limit access to a single mailbox, follow these instructions from Microsoft to create an application access policy.